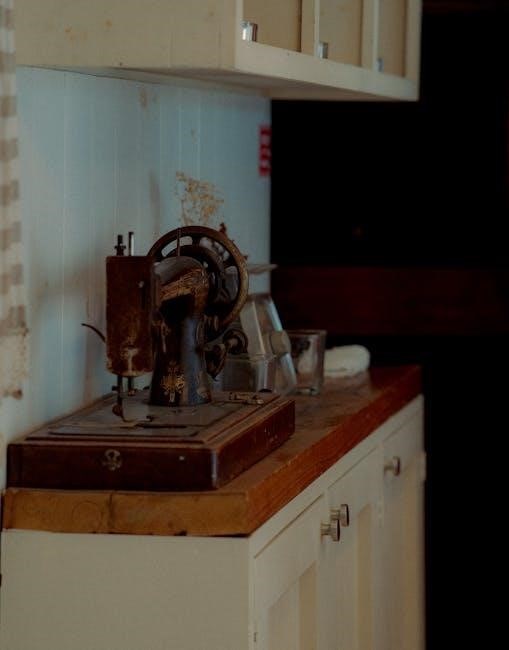
White sewing machines boast a rich history, captivating enthusiasts with their durability and quiet operation, as evidenced by models dating back to 1926.
Numerous online resources, including dedicated forums and expert analyses like Katie Farmer’s, aid in understanding these vintage treasures.
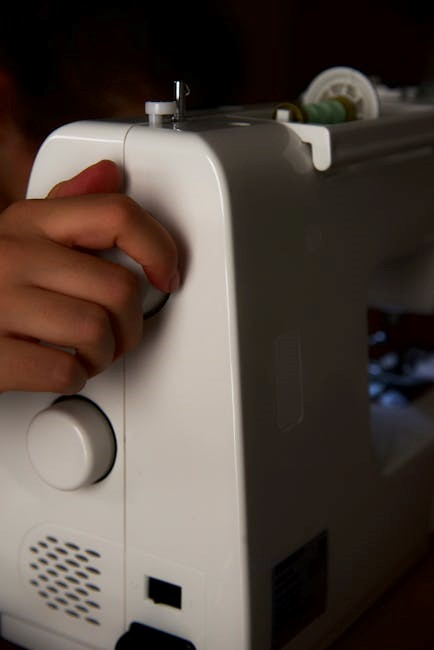
Locating the serial number – often found on the machine’s body, bottom, back, or motor – is crucial for dating and identifying specific models.
From treadle machines to rotary designs, White machines represent a significant legacy in sewing technology, with serial number searches available online.
Understanding the serial number prefixes and decoding them unlocks a deeper understanding of the machine’s manufacturing period and features.
Historical Overview of White Manufacturing Company
White Sewing Machine Company’s origins trace back to 1877, evolving from the White Sewing Machine Manufacturing Company. Initially focused on producing sewing machines, the company quickly gained recognition for innovation and quality craftsmanship.
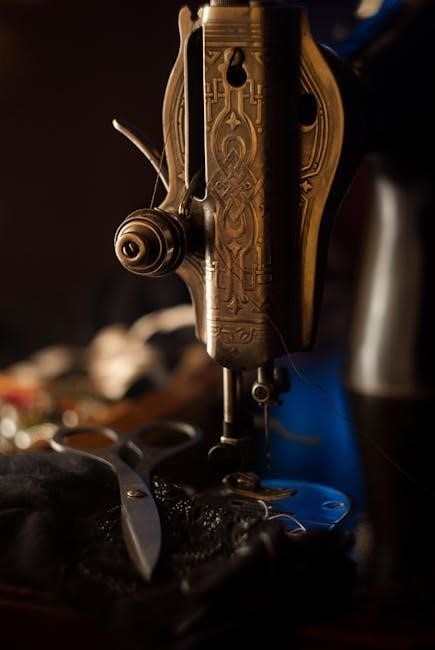
Early White machines, like the bronze embossed models of 1926, were celebrated for their remarkably quiet operation, a testament to their engineering.
The company’s history is interwoven with patent filings, such as William Grout’s 1859 design (US 24,629), showcasing a continuous pursuit of improvement.
Throughout the 20th century, White adapted to changing technologies, producing both treadle and electric sewing machines, each identified by unique serial numbers.
These serial numbers, meticulously documented and searchable, provide a tangible link to the company’s manufacturing timeline, spanning from the late 19th to the mid-20th century.
The company’s legacy continues through the enduring popularity and collectibility of its machines.
Popularity and Legacy of White Machines
White sewing machines cultivated a devoted following due to their reliability and user-friendly design, fostering a lasting legacy among sewing enthusiasts.
The enduring appeal is evident in active online forums and communities dedicated to White machine restoration and operation, demonstrating continued interest.
Vintage White machines, particularly those from the early to mid-20th century, are highly sought after by collectors and quilters alike.
Their quiet operation, noted in discussions about 1926 models, contributes to their desirability, offering a peaceful sewing experience.
The availability of repair manuals and replacement parts, though sometimes requiring diligent searching, further supports their longevity.
White machines represent a tangible connection to a bygone era of quality manufacturing and enduring craftsmanship.
Identifying Your White Sewing Machine
Locating the serial number—found on the machine’s body, bottom, back, or motor—is the first step in uncovering your White machine’s history and model.
Locating the Serial Number
Successfully identifying your White sewing machine begins with finding its unique serial number. This crucial identifier unlocks information about its age, model, and manufacturing details. The location of this number isn’t always immediately obvious, requiring a careful inspection of the machine.
Begin by thoroughly examining the main body of the sewing machine. Check the underside, the back panel, and along the sides for a stamped or applied metal tag. Don’t overlook the area around the motor, as some models feature the serial number directly on it.
Remember to use a flashlight and magnifying glass if the number is faint or difficult to read, as reported by many owners. Patience is key, as the serial number is essential for further research and accessing relevant documentation.
Common Serial Number Locations
Pinpointing the serial number on a White sewing machine often involves checking several key areas. The most frequently reported location is on the underside of the machine’s base, typically stamped into the metal. However, don’t stop there!
Many owners have found the serial number affixed to a metal plate on the back of the machine, often near the handwheel. Inspect the sides of the machine body as well, particularly near the bottom. If your White machine has a motor, carefully examine its housing – the serial number may be located there.
Remember that visibility can be poor, so a flashlight and magnifying glass are invaluable tools. Thoroughness is crucial, as the location can vary between models and manufacturing years.
Decoding Serial Number Prefixes
Understanding the prefixes found before the numerical portion of a White sewing machine’s serial number is key to accurate dating. These prefixes weren’t consistently applied, adding complexity, but offer valuable clues.
Information from experts like Katie Farmer highlights a shift in numbering systems. For example, serial numbers beginning with “VSIII” indicate a specific model under a newer system. Earlier machines may lack prefixes or utilize letter combinations indicating manufacturing variations.
Unfortunately, a comprehensive, publicly available key to all prefixes doesn’t exist. Online forums and communities dedicated to White machines are invaluable resources for deciphering less common prefixes, relying on collective knowledge and shared research.
Dating Your White Machine
Determining the age of your White sewing machine relies heavily on the serial number. While a precise date isn’t always possible, the serial number provides a manufacturing timeframe. Resources like the White Vintage Sewing Machine Serial Number Search (covering 1877-1960) are excellent starting points.
Decoding the serial number prefix, as discussed previously, further refines the dating process. Remember, numbering systems evolved, so a prefix indicates a specific era. Cross-referencing the serial number with online databases and forum discussions can yield more accurate results.
Identifying the model by year is often challenging, but visual comparisons with documented machines can help narrow down the possibilities.
Using Serial Numbers for Age Determination
Serial numbers are the primary key to estimating your White sewing machine’s age. The White Vintage Sewing Machine Serial Number Search, covering models from 1877 to 1960, is a valuable tool. Inputting the complete serial number, including any prefix, initiates the search process.
However, remember that this search provides an estimated date range, not a precise manufacturing date. The system evolved over time, and gaps in records exist. Katie Farmer’s expertise highlights the nuances of these systems.
Comparing your machine’s features with those documented for specific serial number ranges can refine your estimate. Online forums offer collaborative insights from experienced collectors.
Identifying Machine Models by Year
Pinpointing a White sewing machine model by year requires cross-referencing the serial number with available documentation and collector knowledge. The 1926 bronze embossed White machine, noted for its quiet operation, exemplifies a specific era’s design.
Understanding the VSIII system, as detailed by Katie Farmer, is crucial for machines falling under that classification. Examining the machine’s physical characteristics – body style, features, and attachments – further narrows down the possibilities.
Online forums and communities provide valuable resources for comparing your machine to known models from specific years. Remember that variations existed even within the same year.

Essential Parts of a White Sewing Machine
White machines feature a handwheel, bobbin winder, needle/presser foot system, and feed dogs—all vital for operation. These components work harmoniously for stitching.
The Handwheel and its Function
The handwheel is a prominent circular component on your White sewing machine, serving as the primary control for raising and lowering the needle. Rotating the handwheel clockwise moves the needle down, creating a stitch, while counter-clockwise rotation raises it.
It allows for precise manual control, especially useful for intricate work or when starting and stopping at specific points. Even on electric models, the handwheel remains essential for maneuvering fabric and ensuring accurate stitch placement.
Always turn the handwheel towards you to avoid accidents. Never force the wheel if resistance is felt, as this could indicate a problem with the machine’s internal mechanisms. Understanding the handwheel’s function is fundamental to operating your White sewing machine effectively.
The Bobbin Winder Mechanism
The bobbin winder on your White sewing machine is crucial for preparing the bobbin, the small spool that supplies the lower thread. Typically, it involves placing a bobbin onto a spindle, engaging the winder mechanism, and pressing the foot pedal.
The machine’s power then rotates the spindle, winding the thread evenly onto the bobbin. Ensure the thread is guided correctly through the tension discs to achieve a consistent, firm wind.
Disengage the winder once the bobbin is full. Improper winding can lead to uneven stitches or machine malfunctions. Familiarize yourself with your specific model’s winder, as designs may vary slightly, ensuring smooth and reliable operation.
Needle and Presser Foot System
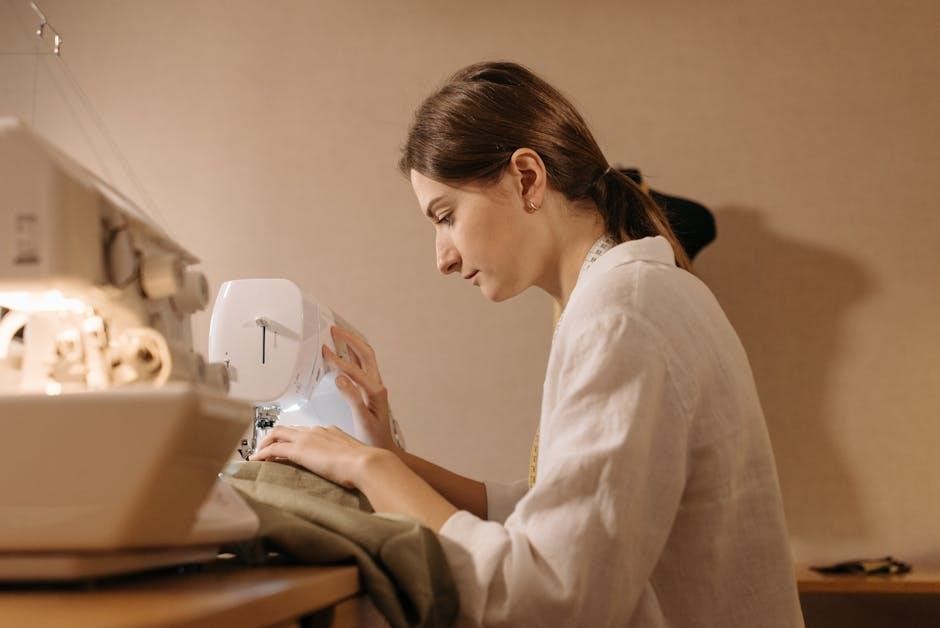
The needle and presser foot system work in tandem to create stitches on your White sewing machine. The needle, selected based on fabric type, pierces the material, while the presser foot holds the fabric firmly in place.
Adjusting the presser foot pressure is vital; lighter fabrics require less pressure, heavier fabrics need more. Ensure the needle is correctly inserted – typically with the flat side facing the back – and tightened securely.
Different presser feet are available for specialized tasks like zippers or buttonholes. Proper needle and foot selection, combined with correct tension, guarantees even, professional-looking stitches.
The Feed Dogs and Stitch Length Control
Feed dogs are the toothed metal pieces beneath the presser foot, responsible for moving fabric through the machine. They grip the fabric and advance it with each stitch, ensuring consistent seam creation.
The stitch length control allows you to adjust the distance between stitches. Shorter stitch lengths are ideal for delicate fabrics or intricate work, while longer lengths suit heavier materials and quicker sewing.
Experimenting with stitch length is key to achieving the desired look and strength for your project. Proper feed dog operation and stitch length adjustment are fundamental to successful sewing with your White machine.
Threading a White Sewing Machine
Threading involves guiding the upper thread through designated guides and correctly winding and inserting the bobbin, ensuring proper tension for seamless stitching.
Upper Threading Guide
Successfully threading your White sewing machine begins with the upper thread path. First, ensure the presser foot is raised, releasing tension discs. Begin by placing the spool of thread onto the spool pin.
Next, guide the thread through the first thread guide, often a small metal hook or loop. Continue following the designated path, typically involving several more guides, ensuring the thread seats correctly in each one.
Pay close attention to any take-up levers, as these are crucial for proper stitch formation. The thread must pass through the take-up lever before proceeding. Finally, thread the needle from front to back, using the needle threader if needed.
A correctly threaded machine is essential for consistent and reliable sewing performance.
Bobbin Winding and Insertion
Preparing the bobbin is key to successful sewing with your White machine. Begin by placing the spool of thread on the spool pin. Guide the thread through the bobbin winding tension disc, ensuring it’s snug but not overly tight.
Next, thread the end of the thread through a hole in the bobbin itself, then onto the bobbin winder spindle. Engage the bobbin winder by pushing it to the right.
Press the foot pedal gently to begin winding; the machine will automatically stop when full. Once wound, carefully insert the bobbin into the bobbin case, following the diagram on the machine. Ensure the thread unwinds in the correct direction.
A properly wound and inserted bobbin guarantees balanced stitch formation.
Correct Thread Tension Adjustment
Achieving balanced stitch tension is vital for quality sewing on your White machine. Incorrect tension leads to looping or puckering. Begin with the tension dial set to its default position, typically marked ‘4’ or ‘5’.
Test sew on a scrap fabric, observing the stitch formation. If the bobbin thread pulls to the top, loosen the upper tension (lower the number). Conversely, if the needle thread pulls to the bottom, tighten the upper tension (raise the number).
Make small adjustments – a quarter turn at a time – and retest after each change. Consistent, even stitches indicate correct tension. Remember that thread type and fabric weight also influence optimal tension settings.
Basic Operation and Stitch Selection
White machines offer straightforward operation; power on electric models and select desired stitch types using designated dials or buttons;
Adjust stitch length and width via corresponding controls for customized sewing, ensuring proper fabric feed and stitch appearance.
Powering On and Off (Electric Models)
White electric sewing machines generally feature a simple on/off switch, often located on the machine’s body or integrated into the foot pedal.
To power on, ensure the machine is plugged into a functioning electrical outlet and depress the foot pedal; the handwheel should begin to rotate.
Some models may have a separate power switch that needs to be flipped to the ‘on’ position before the foot pedal will activate the motor.
Always inspect the power cord for any damage before use, and never operate the machine with a frayed or damaged cord.
To power off, release the foot pedal and, if applicable, flip the power switch to the ‘off’ position.
Disconnecting the machine from the power outlet when not in use is recommended for safety and to prevent accidental activation.
Refer to your specific model’s diagram for precise switch locations.
Selecting Stitch Types
White sewing machines offer a variety of stitch options, typically selected using dials or stitch plates. Older models often focus on straight and zigzag stitches, while later versions may include decorative patterns.
Consult your machine’s manual to understand the specific stitch options available and their corresponding dial settings or plate positions.
Generally, a dial will have markings indicating different stitch types, such as straight stitch, zigzag, and buttonhole settings.
Rotate the dial to the desired stitch, ensuring it clicks into place securely.
Some machines require adjusting stitch width and length after selecting the stitch type for optimal results.
Experiment with different settings on scrap fabric to familiarize yourself with each stitch before working on your project.
Adjusting Stitch Length and Width
White sewing machines typically feature dials or levers to control stitch length and width, influencing the appearance and strength of your seams.
Stitch length is often adjusted using a numbered dial; lower numbers create shorter stitches for delicate fabrics, while higher numbers produce longer stitches for heavier materials.
Stitch width controls the breadth of zigzag stitches or decorative patterns.
A wider setting creates a broader zigzag, useful for stretch fabrics or decorative edging.
Always test stitch settings on scrap fabric before sewing your project to ensure the desired result.
Refer to your machine’s manual for specific guidance on adjusting these controls, as variations exist between models.

Maintenance and Troubleshooting
White sewing machines require regular cleaning and oiling to maintain optimal performance; address skipped stitches, thread breakage, or jamming promptly.
Consistent care ensures longevity and smooth operation of these vintage machines.
Regular Cleaning Procedures
Maintaining a White sewing machine’s pristine condition necessitates consistent cleaning. Begin by disconnecting the power source for electric models. Utilize a soft brush to remove lint and dust from the bobbin area, feed dogs, and surrounding mechanisms. A small vacuum cleaner attachment can also be beneficial for reaching tight spaces.
Wipe down the exterior surfaces with a slightly damp cloth, avoiding harsh chemicals or abrasive cleaners. Pay particular attention to areas where oil accumulates. For stubborn grime, a gentle sewing machine cleaner can be employed, always following the product’s instructions. Regularly cleaning prevents lint buildup, ensuring smooth operation and preventing potential malfunctions. Remember to clean after each use for best results!
Oiling and Lubrication
Proper lubrication is vital for the longevity of your White sewing machine. Use a high-quality sewing machine oil specifically designed for this purpose. Apply a small drop to all moving parts, including the bobbin winder mechanism, needle bar, and feed dog linkage. Avoid over-oiling, as excess oil can attract dust and create a sticky residue.
Focus on points where metal parts rub against each other. After oiling, operate the machine slowly for a few minutes to distribute the lubricant evenly. Regular oiling – typically every few months with moderate use – ensures smooth, quiet operation and prevents wear and tear. Consult your machine’s specific documentation for recommended oiling points.
Troubleshooting Common Issues
Skipped stitches often indicate a dull or incorrect needle, improper threading, or incorrect tension. Ensure the needle is appropriate for the fabric and correctly inserted. Thread breakage can stem from similar issues, alongside burrs on the bobbin case or tension discs. Regularly clean these areas.
Machine jamming frequently results from lint buildup or improperly wound bobbins. Thoroughly clean the bobbin area and ensure the bobbin is wound evenly. If issues persist, consult online forums dedicated to White sewing machines for specific model advice. Remember to always unplug the machine before attempting any repairs.
Skipped Stitches
Skipped stitches on your White sewing machine often signal a few key issues. First, verify the needle is correctly inserted and isn’t bent or damaged. Using the wrong needle type for your fabric is a common culprit; ensure it’s appropriate. Improper threading, even slightly off, can cause this problem – re-thread both the upper and bobbin threads carefully.
Incorrect tension settings also frequently lead to skipped stitches. Experiment with minor adjustments to the upper tension dial. Finally, a build-up of lint and debris around the needle plate can interfere with fabric feed, so regular cleaning is essential.
Thread Breakage
Thread breakage during sewing with your White machine can be frustrating, but is often easily resolved. Begin by checking the threading path for any snags or rough edges that might be damaging the thread. Ensure the bobbin is wound evenly and isn’t too tightly packed. Using old or low-quality thread is a frequent cause, so switch to a fresh, reputable brand.
Incorrect tension, particularly too tight upper tension, can strain the thread. Adjust the tension dial incrementally. A dull or incorrect needle size for the fabric can also contribute to breakage; replace it as needed. Regular cleaning prevents lint build-up, which can weaken the thread.
Machine Jamming
Machine jamming on your White sewing machine typically indicates a build-up of lint and debris within the bobbin area or feed dogs. Immediately power off the machine before attempting to clear the jam. Carefully remove the bobbin case and thoroughly clean it, removing any accumulated lint. Inspect the feed dogs for tangled threads or fabric scraps.
Ensure the presser foot is lowered during sewing, as this engages the feed dogs properly. Avoid forcing the fabric; slow down and gently guide it through the machine. Regularly oiling the machine, as per the maintenance schedule, prevents friction and reduces the likelihood of jamming. A properly threaded machine is also crucial.
Advanced Techniques and Features
White machines offer darning and embroidery capabilities, alongside attachment versatility, enhancing creative potential. Free motion sewing unlocks artistic expression, expanding beyond standard stitch patterns.
Using Attachments and Accessories
White sewing machines were often sold with, or had available, a wide array of attachments designed to expand their functionality beyond basic sewing. These accessories, detailed in original instruction manuals, included specialized presser feet for tasks like gathering, darning, and creating decorative stitches.
Additional attachments could facilitate buttonholing, zipper insertion, and even embroidery work. Understanding how to properly install and utilize these attachments is key to unlocking the full potential of your vintage White machine.
Many online communities dedicated to vintage sewing machines share information and guidance on locating and using these often-unique accessories. Proper attachment use ensures optimal stitch quality and prevents damage to both the machine and the fabric.
Free Motion Sewing
While not explicitly detailed in all original White sewing machine instruction manuals, many models are capable of free motion sewing – a technique allowing for artistic control over stitch placement. This typically involves disengaging the feed dogs, which normally advance the fabric automatically.
By lowering the feed dogs and using a darning foot, the operator can move the fabric freely under the needle, creating designs, quilting patterns, or embellishments. Achieving smooth, consistent free motion requires practice and adjusting stitch length and tension.
Online resources and modern tutorials often demonstrate adapting vintage White machines for this technique, offering guidance on foot selection and optimal settings. It unlocks creative possibilities beyond standard stitching.
Darning and Embroidery Capabilities
Original White sewing machine instruction manuals frequently highlighted their darning capabilities, a crucial repair skill for the era. A darning foot, often included with the machine, facilitated seamlessly mending holes in fabrics like socks and stockings.
Beyond simple repairs, many White machines were also used for basic embroidery. Utilizing decorative stitches and a variety of presser feet, users could create floral patterns, monograms, and other embellishments on linens and garments.
The quiet operation of these machines, noted by owners of 1926 models, made intricate handwork more enjoyable. Modern resources expand on these capabilities, showcasing how vintage White machines can still be used for creative embroidery projects today.

Resources for White Sewing Machine Owners
White machine owners benefit from vibrant online forums, repair manuals, and communities like Katie Farmer’s expertise, aiding in part sourcing and troubleshooting.
Dedicated websites offer serial number searches and documentation.
Online Forums and Communities
White sewing machine enthusiasts have cultivated thriving online spaces dedicated to sharing knowledge, troubleshooting issues, and preserving the legacy of these vintage machines. These forums serve as invaluable resources for owners seeking assistance with everything from identifying models based on serial numbers to locating hard-to-find replacement parts.
Members frequently discuss the nuances of threading, maintenance, and repair, often referencing experts like Katie Farmer for accurate information. Discussions often revolve around deciphering faded or incomplete instruction manuals, with community members collaboratively reconstructing guides or sharing scanned copies of original documentation.
These platforms provide a supportive environment for both novice and experienced users to connect, exchange tips, and celebrate the enduring quality of White sewing machines. Active participation can unlock a wealth of practical advice and historical insights.
Repair Manuals and Documentation
Finding original White sewing machine instruction manuals can be challenging, given their age. However, dedicated online communities often archive and share scanned copies of these valuable resources. These manuals provide detailed diagrams and step-by-step instructions for threading, maintenance, and basic repairs.
While comprehensive manuals for every model aren’t always available, partial documentation and repair guides can often be pieced together from various sources. Experts like Katie Farmer are frequently referenced as authorities on White machine specifics.
Supplementing these resources, general sewing machine repair manuals can offer insights into common mechanical issues. Understanding serial number prefixes aids in identifying the correct documentation for your specific machine model, ensuring accurate repair procedures.
Finding Replacement Parts
Sourcing replacement parts for vintage White sewing machines requires patience and resourcefulness. Online forums and communities dedicated to antique sewing machines are excellent starting points, as members often share sources and part numbers.
Specialty sewing machine repair shops may stock or be able to order parts, particularly for common models. Identifying your machine’s serial number is crucial when requesting parts, ensuring compatibility.
eBay and other online auction sites frequently list vintage White parts, but careful inspection of the listing and seller feedback is essential. Sometimes, parts from similar machines can be adapted, but this requires mechanical expertise.
Leave a Reply